Saraga Audiovisual#
Saraga Audiovisual is a dataset that includes new and more diverse renditions of Carnatic vocal performances, totaling 42 concerts and more than 60 hours of music.
A major contribution of this dataset is the inclusion of video recordings for all concerts, allowing for a wide range of multimodal analyses. We also provide high-quality human pose estimation data of the musicians extracted from the video footage. Additionally, we perform benchmarking experiments for the different modalities to validate the utility of the novel collection. For more details refer to [Siv24] paper.
Saraga Audiovisual, along with access tools and results of our experiments, is made available for research purposes.
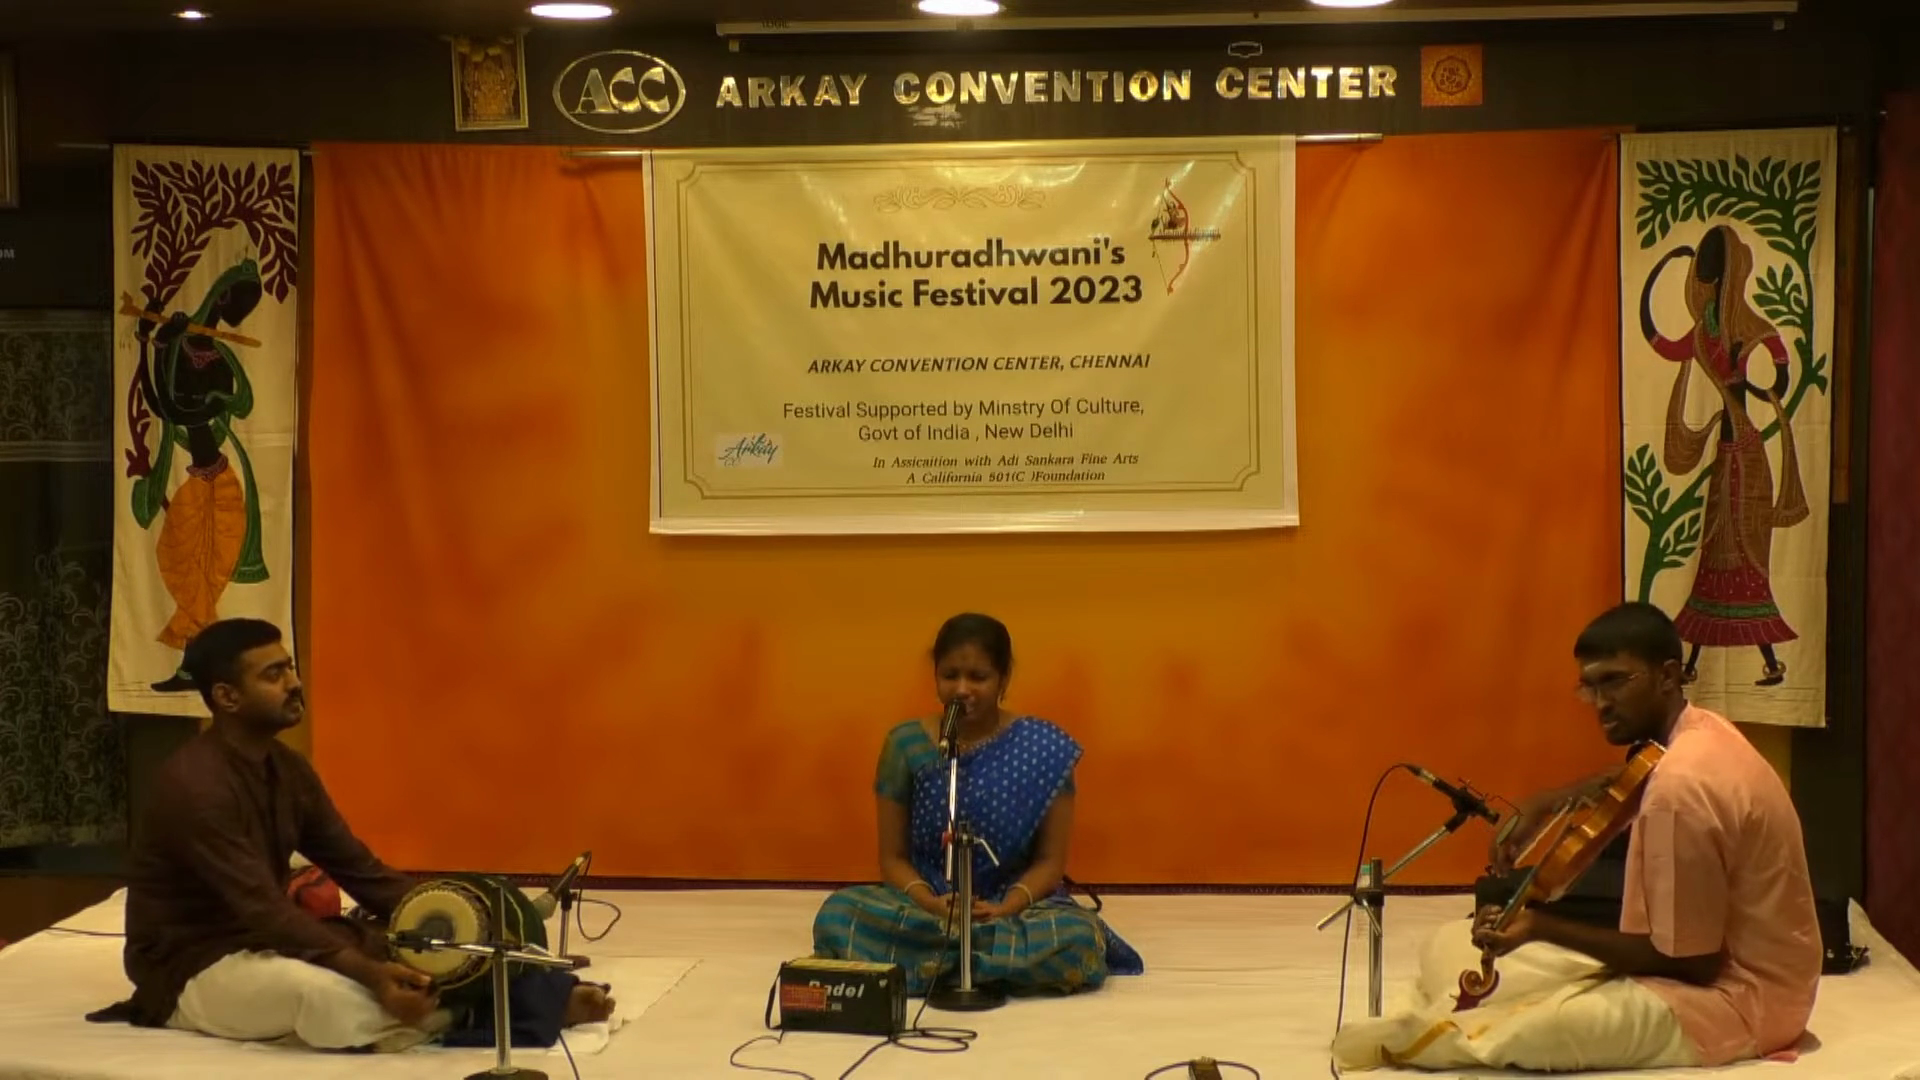
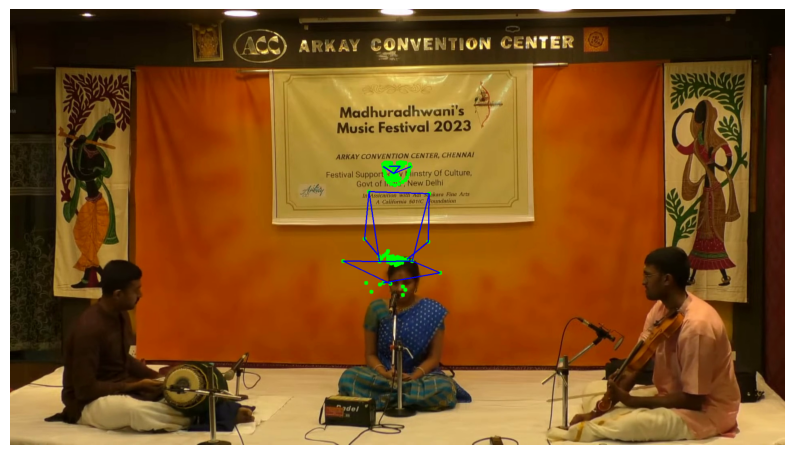
Fig. 23 Adithi Prahlad performing Ananda Natana Prakasham#
1.Accessing the Saraga Audiovisual Dataset#
1.1.Download the Dataset#
The Saraga dataset is available on Zenodo. You can download it using the following link:
Zenodo Link
The dataset is split into multiple parts, each containing specific components:
File |
Description |
|---|---|
|
Multi-track audio + mixture files |
|
Pose estimation data from videos |
|
Metadata for all audio files |
|
Videos from three sample concerts (subset only) |
For access to the full video collection, contact the dataset providers.
Visit Zenodo and manually download the required zip files.
Alternatively, you can use the code below to download the dataset.
#!pip install wget
import requests

urls = [
    ("saraga_audio.zip",
     "https://zenodo.org/records/16411600/files/saraga%20audio.zip?download=1"),
    ("saraga_gesture.zip",
     "https://zenodo.org/records/16411600/files/saraga%20gesture.zip?download=1"),
    ("saraga_metadata.zip",
     "https://zenodo.org/records/16411600/files/saraga%20metadata.zip?download=1"),
    ("saraga_visual.zip",
     "https://zenodo.org/records/16411600/files/saraga%20visual.zip?download=1"),
]

for filename, url in urls:
    print(f"Downloading {filename}...")
    response = requests.get(url, stream=True)
    response.raise_for_status()

    with open(f"../data/{filename}", "wb") as f:
        for chunk in response.iter_content(chunk_size=8192):
            if chunk:
                f.write(chunk)

print("All downloads complete.")
Downloading saraga_audio.zip...
Downloading saraga_gesture.zip...
Downloading saraga_metadata.zip...
Downloading saraga_visual.zip...
All downloads complete.
1.2. Extract the Dataset#
Once the files are downloaded, extract them into a common folder.
For that, we use zipfile, a Python library for handling zip files.
import zipfile
saraga_folder = "../data/saraga"
zip_files = ["../data/saraga_gesture.zip", "../data/saraga_metadata.zip", "../data/saraga_visual.zip", "../data/saraga_audio.zip"]
# Extract each zip file to extract path
for zip_file in zip_files:
    with zipfile.ZipFile(zip_file, 'r') as zip_ref:
        zip_ref.extractall(saraga_folder)
    print(f"Extracted {zip_file} to {saraga_folder}")
Extracted ../data/saraga_gesture.zip to ../data/saraga
Extracted ../data/saraga_metadata.zip to ../data/saraga
Extracted ../data/saraga_visual.zip to ../data/saraga
Extracted ../data/saraga_audio.zip to ../data/saraga
Saraga Dataset Structure#
The saraga folder contains four separate subfolders:
saraga_gesturesaraga_metadatasaraga_visualsaraga_audio
Each of these folders follows the same structure:
They contain folders of concerts named after the lead vocalist.
Each concert folder contains multiple song folders.
Each song folder contains files related to a specific performance.
Metadata#
Location:
saraga_metadataEach song folder contains a
.jsonfile with:title: Title of the songmbid: MBID of the performing artistslength: Duration of the performanceartists: A dictionary with artist details:{ "mbid":, "name":, "instrument": { "mbid":, "name": }, "lead":, "attributes": }
raga: Information about the ragataala: Information about the taala
Visual#
Location:
saraga_visualEach song folder contains a
.movfile of the video performance.
Audio#
Location:
saraga_audioEach song folder contains:
A full mix
.wavfileMultitrack
.wavfiles with the song title as prefix:vocal.wavviolin.wavmridangam-left.wavmridangam-right.wav
Gesture#
Location:
saraga_gestureEach song folder contains subfolders for:
singerviolinmridangam
Each of these subfolders contains:
Keypoints file (
*kpts.npy):
A NumPy array of shape(num_frames, num_keypoints, 2)containing the gesture keypoints.Scores file (
*scores.npy):
A NumPy array of shape(num_frames, num_keypoints)containing confidence values for each keypoint.
2.Processing Audiovisual Data#
Now we will process the keypoints from the gesture dataset and display the skeleton on the performance video. For this tutorial, we will use Ananda Natana Prakasham by Aditi Prahalad.
2.1. Load Gestures and Video#
Let’s import the necessary libraries required for processing the video and gestures.
#!pip install opencv-python
import cv2
import numpy as np
import matplotlib.pyplot as plt
# Define File Paths for the Relevant Performance
keypoints_path = "../data/saraga/saraga gesture/Aditi Prahlad/Ananda Natana Prakasham/singer/singer_0_753_kpts.npy"
scores_path = "../data/saraga/saraga gesture/Aditi Prahlad/Ananda Natana Prakasham/singer/singer_0_753_scores.npy"
video_path = "../data/saraga/saraga visual/Aditi Prahlad/Ananda Natana Prakasham/Ananda Natana Prakasham.mov"
save_path = "../data/output.mp4"
Load the keypoints and scores file for the performance.
keypoints = np.load(keypoints_path)
scores = np.load(scores_path)
Now, we will define the skeleton—a list of tuples that defines how keypoints should be connected to form a human pose. For example, the left shoulder should be connected to the left elbow, and the elbow to the wrist.
# Skeleton for 135 keypoints (MMPose)
skeleton = [
    (0, 1), (1, 2),     # Eyes (left to right)
    (0, 3), (0, 4),     # Nose to ears (left and right)
    (5, 6),             # Shoulders (left and right)
    (5, 7), (7, 9),     # Left arm (shoulder -> elbow -> wrist)
    (6, 8), (8, 10),
    (11,12),            # Right arm (shoulder -> elbow -> wrist)
    (5, 11), (6, 12),   # Shoulders to hips
    (11, 13), (13, 15), # Left leg (hip -> knee -> ankle)
    (12, 14), (14, 16)  # Right leg (hip -> knee -> ankle)
]
2.2.Process the frames#
Create a temporary output video file so that we can save the processed video with the overlayed skeleton and gestures.
cap = cv2.VideoCapture(video_path)
fps = int(cap.get(cv2.CAP_PROP_FPS))  # Frames per second
frame_width = int(cap.get(cv2.CAP_PROP_FRAME_WIDTH))
frame_height = int(cap.get(cv2.CAP_PROP_FRAME_HEIGHT))
out = cv2.VideoWriter(save_path, cv2.VideoWriter_fourcc(*'mp4v'), fps, (frame_width, frame_height))
Now, let’s project the skeleton onto the video frames. First, we will select a 20-second segment to process.
start_time = 10  # Start time in seconds (adjust as needed)
end_time = start_time + 5  # End time in seconds
start_frame = int(start_time * fps)
end_frame = int(end_time * fps)
frame_idx = 0
while cap.isOpened():
    # read current frame
    ret, frame = cap.read()
    if not ret:
        break

    if start_frame <= frame_idx < end_frame:
        # Get keypoints and scores for the current frame
        if frame_idx < len(keypoints):
            frame_keypoints = keypoints[frame_idx]
            frame_scores = scores[frame_idx]

            # Draw keypoints
            for i, (x, y) in enumerate(frame_keypoints):
                # Only draw if confidence score is above threshold
                if frame_scores[i] > 0.5:  # Adjust threshold as needed
                    cv2.circle(frame, (int(x), int(y)), 5, (0, 255, 0), -1)

            # Draw skeleton
            for connection in skeleton:
                start, end = connection
                # Only draw if confidence score is above threshold
                if frame_scores[start] > 0.5 and frame_scores[end] > 0.5:
                    x1, y1 = frame_keypoints[start]
                    x2, y2 = frame_keypoints[end]
                    cv2.line(frame, (int(x1), int(y1)), (int(x2), int(y2)), (255, 0, 0), 2)

        # Write frame to output video
        out.write(frame)

    frame_idx += 1

    # Stop processing after the end frame
    if frame_idx >= end_frame:
        break
Free the resources after processing.
cap.release()
out.release()
cv2.destroyAllWindows()
2.3.Display the Result#
Great! We have the results. Now, we can display the video in the notebook using IPython.display.
import IPython.display as ipd
import subprocess
To display the video in the notebook, we need to re-encode the output into a web-supported format (H.264).
web_path = save_path.replace(".mp4", "_web.mp4")

subprocess.run([
    "ffmpeg",
    "-y",
    "-i", save_path,
    "-vcodec", "libx264",
    "-acodec", "aac",
    "-pix_fmt", "yuv420p",
    web_path
], stdout=subprocess.DEVNULL, stderr=subprocess.DEVNULL, check=True)

print("Re-encoded to:", web_path)
Re-encoded to: ../data/output_web.mp4
ipd.display(ipd.Video(web_path, embed=True, width=640, height=360))
2.4.Normalizing the keypoints#
We might want to normalize the keypoints to further perform analysis on them, such as calculating the kinetic energy of the dominant hand of the singer — as done in this paper.
To do this, we need to normalize the keypoints to the origin.
This involves computing the centroid of the performer’s body, which we define as the mean of the keypoints for the following body parts:
Left shoulder
Right shoulder
Left hip
Right hip
The centroid is computed as the average of the coordinates of these four keypoints.
Define the keypoints of the shoulders and hips
shoulder_left = 5
shoulder_right = 6
hip_left = 11
hip_right = 12
Calculate the singers centroid for each frame and normalize the keypoints
for frame in range(len(keypoints)):
    centroid = keypoints[frame][shoulder_left] + keypoints[frame][shoulder_right] + keypoints[frame][hip_left] + keypoints[frame][hip_right]
    centroid /= 4

    keypoints[frame] -= centroid
Now, lets display the new position of the keypoints with respect to frames by plotting a frame
cap = cv2.VideoCapture(video_path)
fps = int(cap.get(cv2.CAP_PROP_FPS))  # Frames per second
frame_width = int(cap.get(cv2.CAP_PROP_FRAME_WIDTH))
frame_height = int(cap.get(cv2.CAP_PROP_FRAME_HEIGHT))

for i in range(np.random.randint(20)):
    ret, frame = cap.read()
    frame_idx = i

# Get keypoints and scores for the current frame
if frame_idx < len(keypoints):
    frame_keypoints = keypoints[frame_idx]
    frame_scores = scores[frame_idx]

    # Draw keypoints and skeleton
    for i, (x, y) in enumerate(frame_keypoints):
        # Only draw if confidence score is above threshold
        if frame_scores[i] > 0.5:  # Adjust threshold as needed
            cv2.circle(frame, (int(x + frame_width / 2), int(y + frame_height / 2)), 5, (0, 255, 0), -1)

    # Draw skeleton
    for connection in skeleton:
        start, end = connection
        if frame_scores[start] > 0.5 and frame_scores[end] > 0.5:
            x1, y1 = frame_keypoints[start]
            x2, y2 = frame_keypoints[end]

            # Even though the keypoints are normalized to origin (0, 0), to draw the skeletion at the center of the image,
            # you will have to move the keypoints by height/2 in y axis direction and width/2 in x axis
            x1 += frame_width / 2
            x2 += frame_width / 2
            y1 += frame_height / 2
            y2 += frame_height / 2
            cv2.line(frame, (int(x1), int(y1)), (int(x2), int(y2)), (255, 0, 0), 2)

plt.figure(figsize=(10, 6))
plt.imshow(cv2.cvtColor(frame, cv2.COLOR_BGR2RGB))
plt.axis('off')
plt.show()